Based on my last post and some interest in the process of applying split grads in LR3, I decided to show a simple illustration of that process with this landscape photo that I took in Polychrome Pass, late one night in August.
A video might be better to explain all this, but there is some advantage to seeing all the pictures as well.
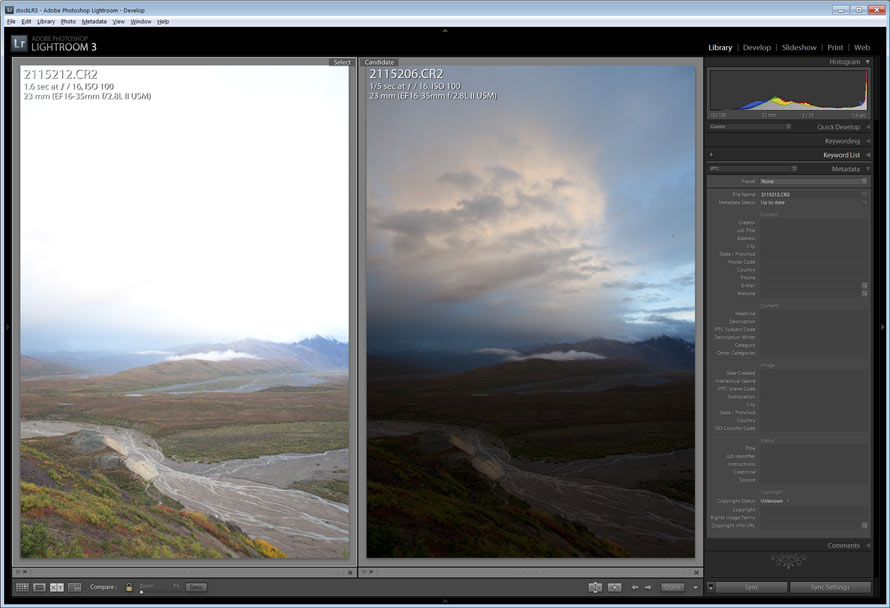
To exposures about two stops apart. One exposed for the foreground, one exposed for the sky
The above illustration shows two different exposures of the same scene. They are approximately two stops apart. One is exposed for the foreground and one for the sky. Both are a little extreme, so I used an exposure in the middle, exposed to the right for shadow potential maximized, see below.
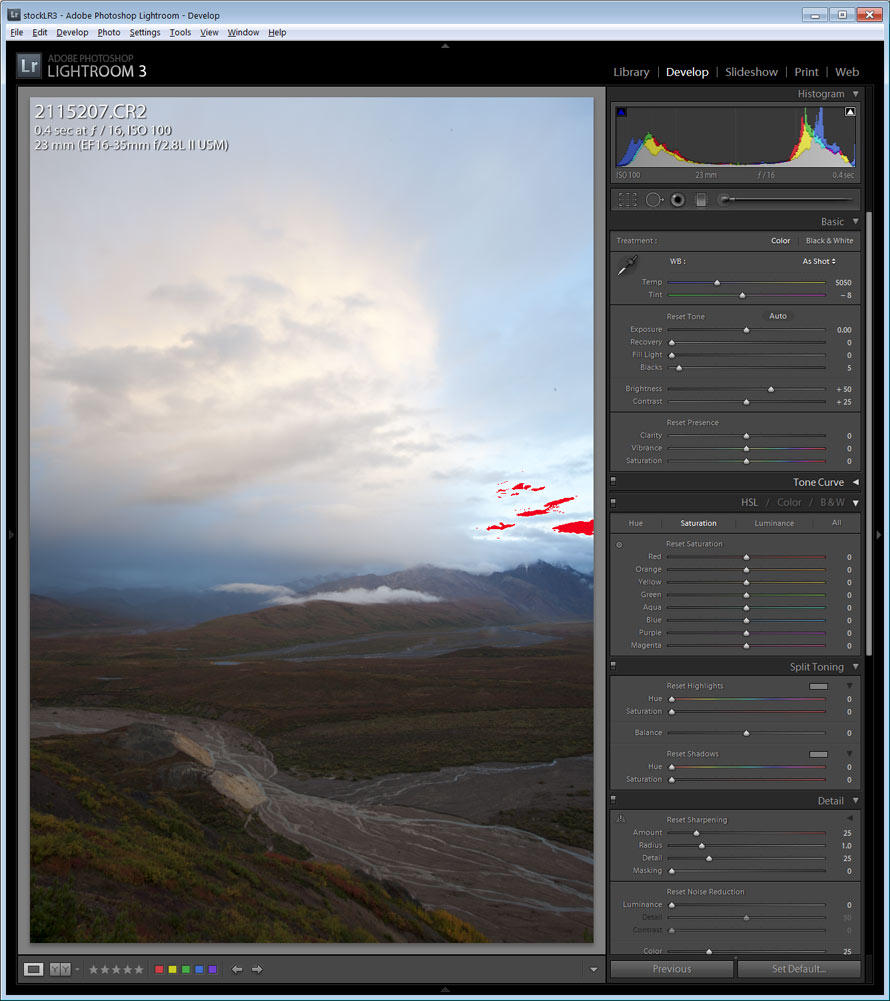
Exposed to the right just with a slight highlight warning in the sky.
I chose to use this image, with just a slight highlight blink which is recoverable through exposure and recover sliders in LR3. The anticipated post production application is two split grads, one for the sky and one for the foreground. See this development below.
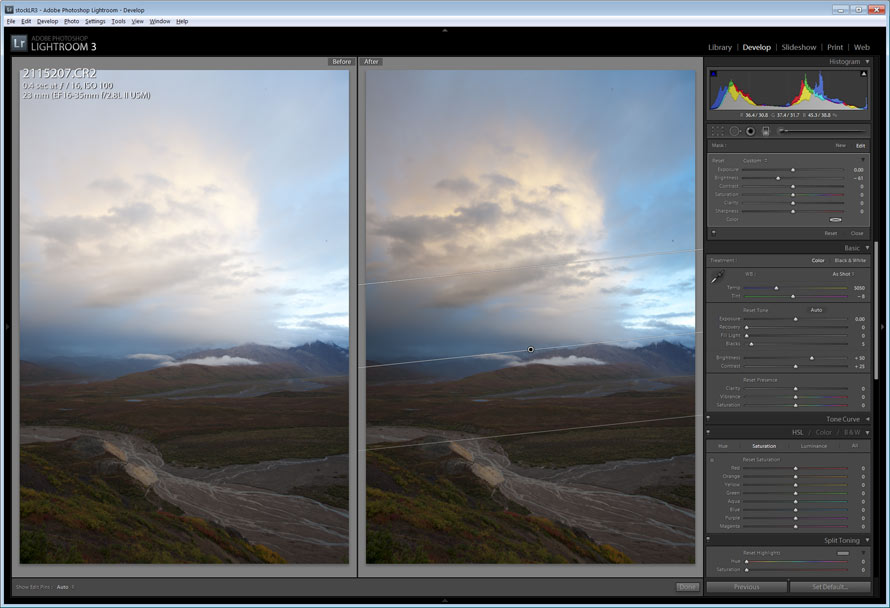
Slight exposure correction and application of split grad for sky
To start with I made a slight decrease in overall exposure and applied a split grad filter with the brightness reduced to about -50
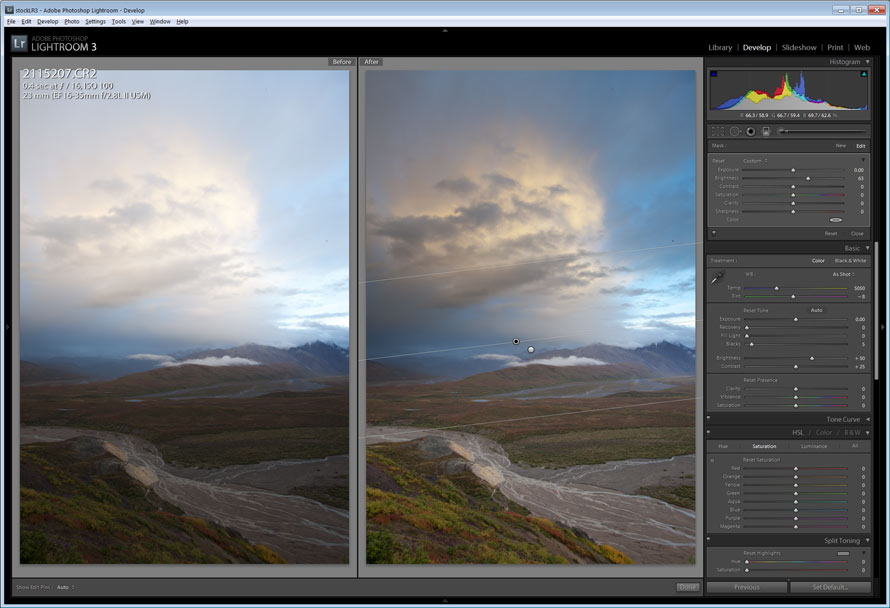
Application of split grad for the foreground
I then added another split grad in reverse proportion for the foreground (note the little dots that show the angle of the split grad. The black dot means that grad is active and the space between the two lines is the region of the gradation. The longer the space, the softer the gradation.)
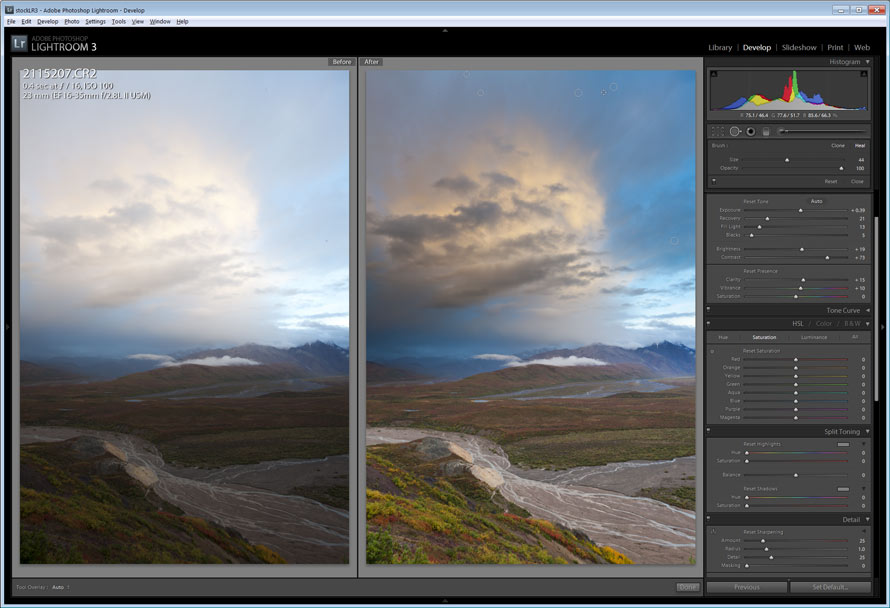
Final tweaks of contrast, vibrance, clarity, etc., along with a few dust stamps.
After that, I applied a few other changes: contrast +8, vibrance +10, clarity +15, along with some overall recovery, fill and exposure/brightness tweak. Then the camera lens profile correction was added along with a few dust spots stamped out. And there you have the finished product.
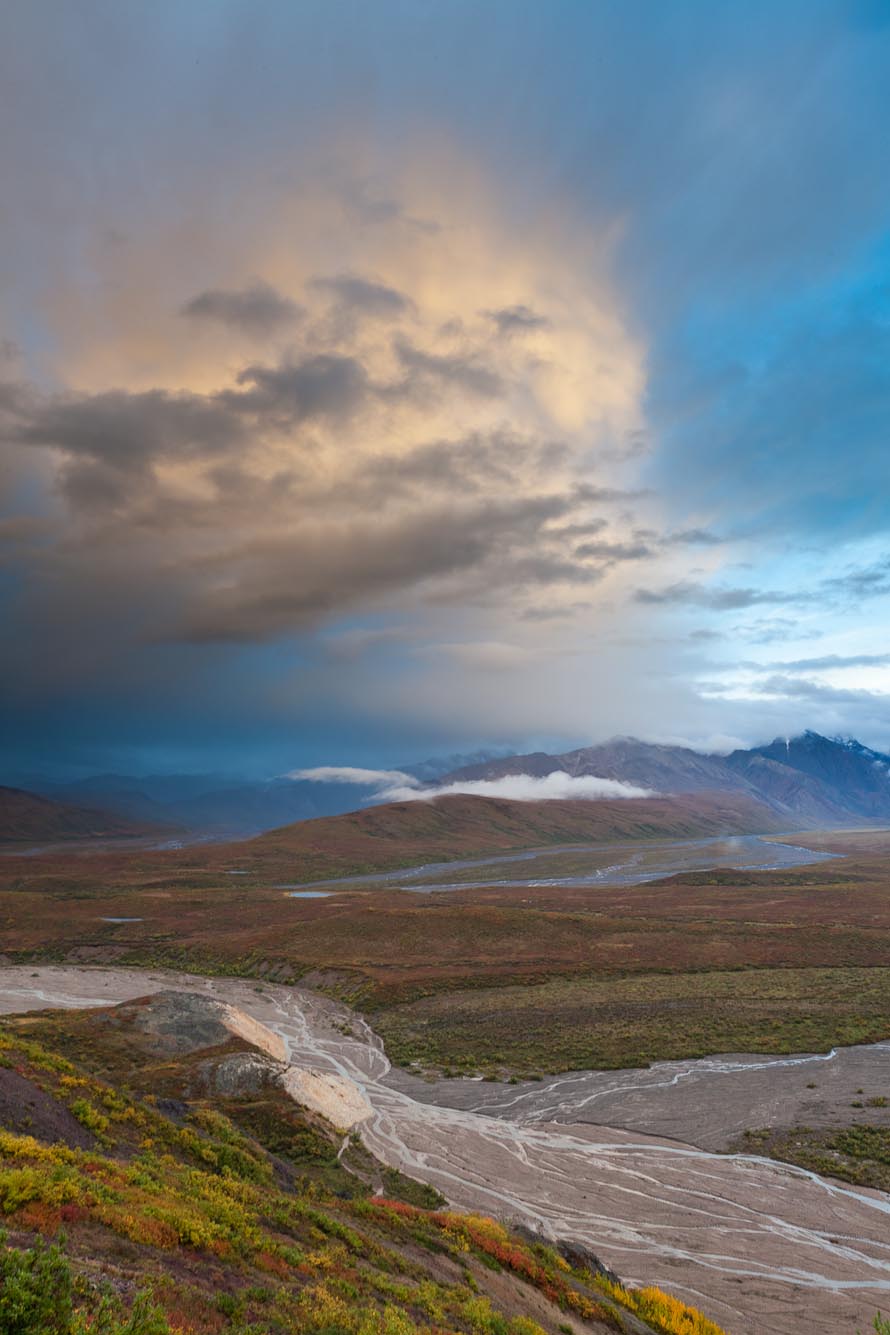
Polychrome pass, Denali National Park, Alaska. Canon 5D Mark III, 16-35mm f/2.8L, 0.4 sec @ f/16, ISO 100
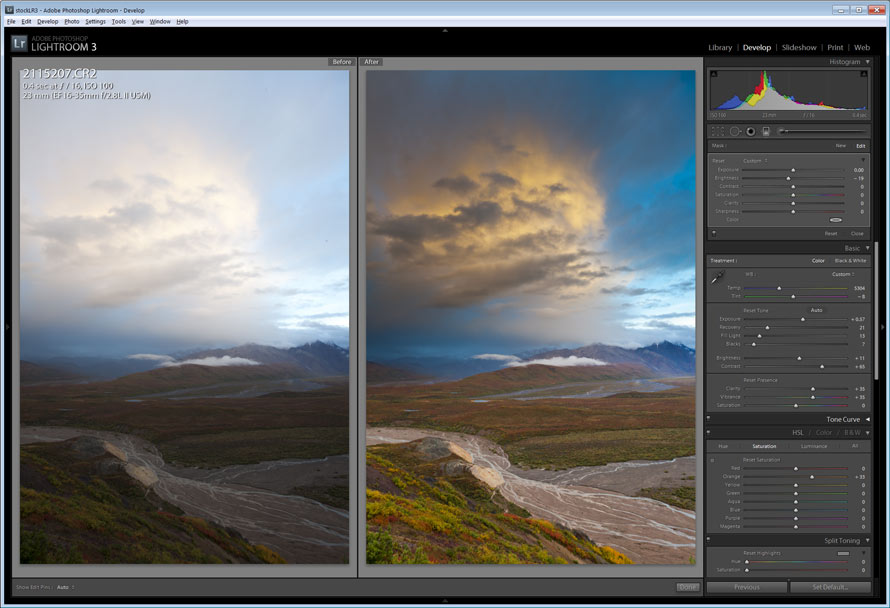
Final extra tweaked version
And if you really want to art out the scene, you could go a few steps further. This is all a matter of preference and I prefer to stay more true to the scene, but by adding two more split grads in variation to the sky, warming the color temperature a bit, and adding a little more vibrance and saturation to the warm colors, you end up with this.


