 For a landscape photographer, one must learn how to deal with the great variations in exposure value between the sky and the foreground. In the film industry, it has been called “sky control”, although one may want to control the foreground as well. Generally, the sky ends up being much brighter than the foreground, and the disparity between the two, although within the range of the human eye, can’t be handled by conventional film/digital sensors. So, what to do about this?
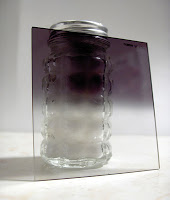
In the old days of film, I used the photography standard “Split-graduated neutral density filters”. Essentially, they are thin pieces of glass or resin, that have a graduated pattern that blocks out light in varying stops (degrees of exposure value). They are clear in one half, and dark on the other. They come in different stop values with different degrees of gradients-usually described as hard or soft edge. You pick the right one for the specific scene and slide it down over the end of your lens and it makes the foreground and the sky the same exposure value.
I really disliked using those filters! First of all, they are not truly neutral in my opinion, they are difficult to get lined up correctly, they scratch and get fingerprinted easily, if it is raining, get out the umbrellas!, and finally, you are adding layers of stuff on the end of expensive, high quality glass, inevitably causing some quality compromise. Well, welcome to the digital world! I got rid of nearly my entire filter collection, including the Split ND’s a long time ago. But what is the approach now? Below is an example of what/how I approach this issue today, using a digital camera, RAW files, and photoshop gradient filters.
It was a dark morning with mostly cloudy skies. The thin clear area in the east looked promising for a splash of sunshine, so I quickly found a place that might work for a daybreak landscape. The tundra was in its prime crimson color, and I knew the warmth of it would explode at first light. When the sun is rising over a horizon with quickly moving clouds, there is little time to waste. In this scene, I knew that I needed to balance the exposure using two or more frames–one exposed for the sky and one for the foreground, so I set the camera to a 3 set auto-bracket sequence of 1-2/3 stop increments (that’s about 5 stops total) I set the self timer to a 2 second delay, (I was on very soft tundra, not the best for stability). Once the sun appeared I shot a test shot and looked at the exposures, made sure the histograms looked o.k. for each scene. Oh by the way, being in manual exposure mode is a must.
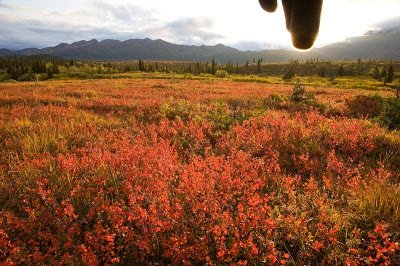
There is however and additional issue that arises: Lens flare. I used a 24-105mm zoom lens for this shot, and zoom lenses are pretty well known in general for flare, since there are so many internal glass elements for light to bounce off of. I own 5 lenses in the 24mm range, which is ridiculous, but they all seem to have a purpose. I did not however have my little 24mm prime, which would have handled the flare much better. So, what is my work around? Well, it’s a little more time consuming, but pretty simple. For one frame, I just hold my finger over the sun so it reduces the flare on the bottom half of the image. Depending on the situation, you might need to reverse this for the sky image as well. What would be handy is a little articulating arm on the tripod that had a small dodge tool on the end of it, and one could bend it in place. But then, it’s likely I’d forget that occasionally anyway! I always have my fingers, and working fast is the critical issue.
 Exposure for the foreground, using my finger over the sun to block out the unwanted flare otherwise evident (see image below).
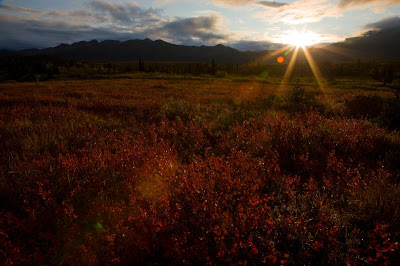
 Exposure compensating for the bright light of the sky.
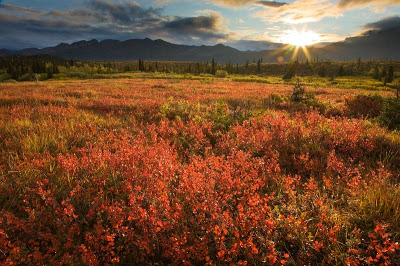
So, I have the two frames: 1) Foreground- with my finger in the sky over the light source to block the flare exposed for the foreground. 2) Sky. Open the files in Lightroom to make your adjustments to the raw file, then open the two in photoshop. Pick one image, drag it into the other while holding down the shift key and it aligns it perfectly (presuming your tripod did not move). Then apply a gradient filter using a mask, which emulates the old split graduated ND filter–but with much more control. This whole process can be done rather quickly.
 Final blended image using two photos and photoshop’s gradient filter to emulate the former split graduated neutral density filter.
Yes, it is true that if you used the real Split grad ND filters, you would have an original file that is balanced. While that is a nice thought, I go for the former for reasons of simplicity, quality, and control. Welcome to the digital age. Get rid of the split grads!


I didn’t think I would ever get so excited about someone flipping the finger 🙂 I have been struggeling with flare using this technique, but this might solve it for me.
Thanks!
PS! When are you comming to Lofoten?
ATB, Roy
Roy,
Lofoten has the lure, but not on the calendar yet. Careful when and where you flip the finger 🙂
I’m off to Katmai for a week.
Patrick