Sky control is fundamental to landscape photography. The term refers to ways in which a photographer manages the disparity in exposure values between the sky (which is often bright) and the foreground (which is often dark). The “balancing” is necessary because film can’t record the full range of tonal value (dynamic range) that the human eye is able to distinguish. Filters called split-graduated neutral density filters, are used to help balance these differences. I used them frequently when I shot film, but in shooting digital, I’ve found they are often not needed. If you use these filters I’m not saying to get rid of them completely, since there are times when they can still be used, but I’d like to show a few examples of when I would have previously used them, but chose not too, and ended up with a very pleasing looking image without them.
Since the edge of a split grad ND filter is straight, they work best when an edge in your scene is equally straight. I shoot mostly in Alaska and with all the mountain and glacier scenery most of my compositions lacked that necessary feature. I found it often ineffective using the split grad ND filter.
Today, getting by without one is largely due to the excellent noise-free low ISO of digital camera sensors, and the option to apply a digital split grad filter in a RAW processing software like Lightroom. I’ll use 3 examples from my recent trip to South America, since it is a current subject. Two of the examples below are reasonable candidates for the old physical split grad ND filter, since the demarcation line in exposure difference is pretty straight. The last one however, of Machu Picchu, would present some problems.
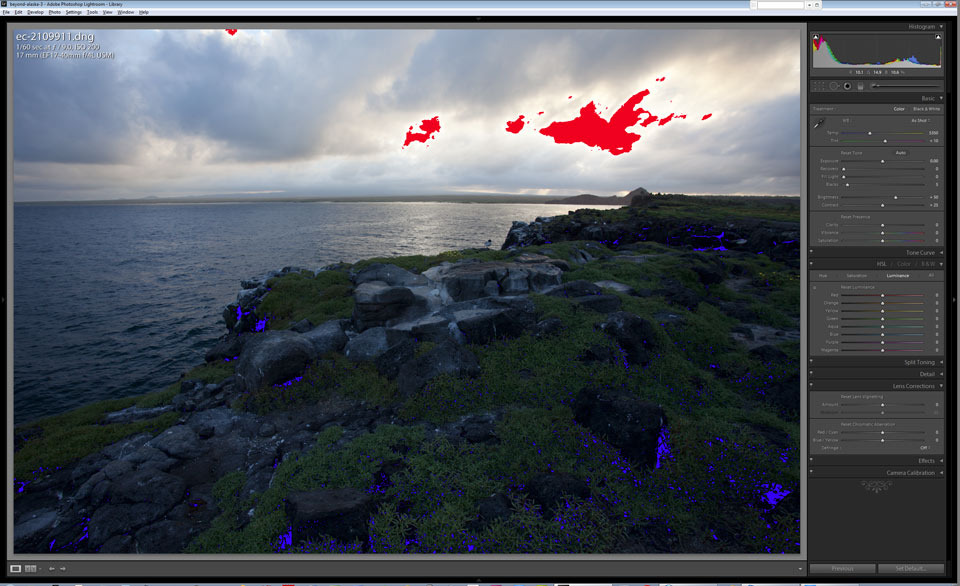
South Plaza Island sunset, Galapagos Islands. Canon 5D Mark II, 17-40mm f/4L (17mm) 1/60 sec @ f/9, ISO 200. Using and ISO of 100 would have been best but 200 held up pretty well. Why didn't I use ISO 100? Well, I was in a rush due to a number of factors, and I forgot.
I prefer to shoot landscapes with the camera in manual mode so I can carefully tweak the exposure to a slightly overexposed state, yet recoverable within the RAW processing software. I do this in order to maximize detail in the shadowed areas. It is ideal to shoot at a low ISO, and with my camera’s that is usually ISO 100. In Lightroom, if you click on the little white triangles at the top corners of the histogram in develop mode, it activates the highlight and shadow warnings. The red color represents highlights that need to be recovered (they would be blinking on the back of your camera LCD, and are depicted in the histogram as touching the right hand wall. The blue represents shadows that are black and lacking detail, and are touching the left hand wall of the histogram. You will soon learn to ignore your camera LCD monitor and pay attention to your histogram. And you will also learn what can be restored through basic exposure adjustments.
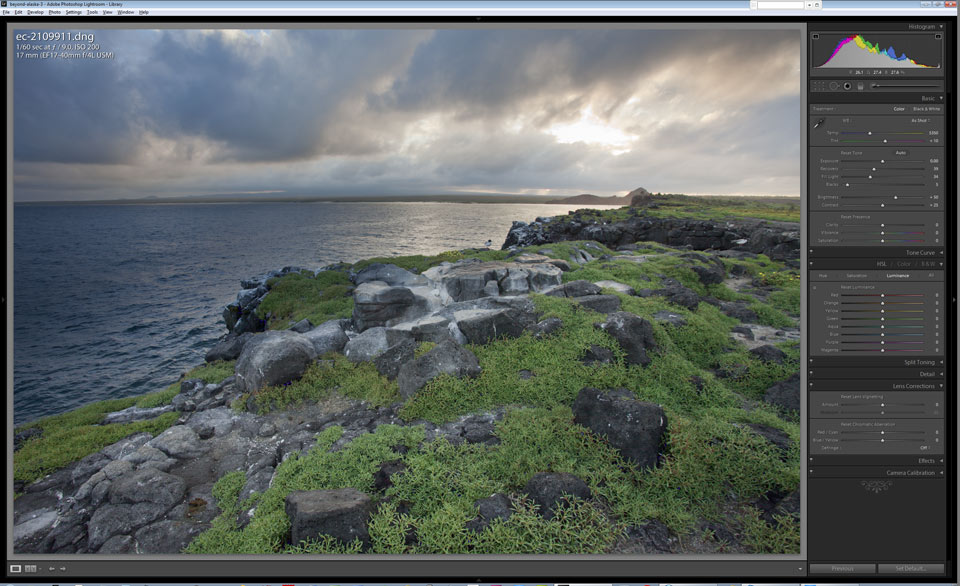
It is important to remember to view your image at 100% often, and check your edges, especially when using the recovery and fill light sliders.
This screen capture represents slight tweaks that let you control the highlights and shadows of your file. You can see with a few minor adjustments, the highlights and shadows are appropriately recovered. Nothing is touching the wall in the histogram now.
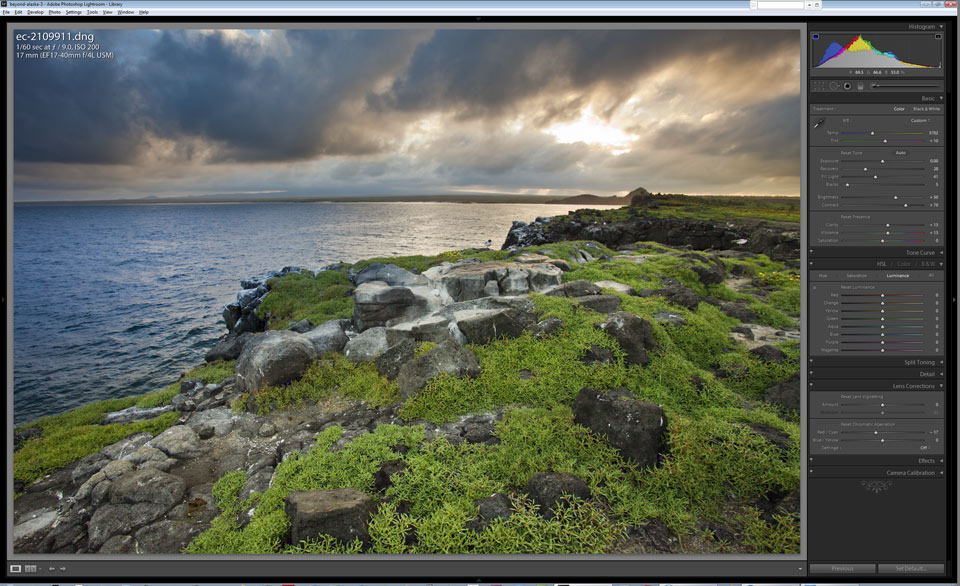
Finished file which shows all the develop attributes applied.
After that, the application of digital split graduated filters within Lightroom, in conjunction with some specific burning and dodging using the brush tool, contrast, clarity and vibrance, the image comes to life. Note that I did not use the saturation slider.
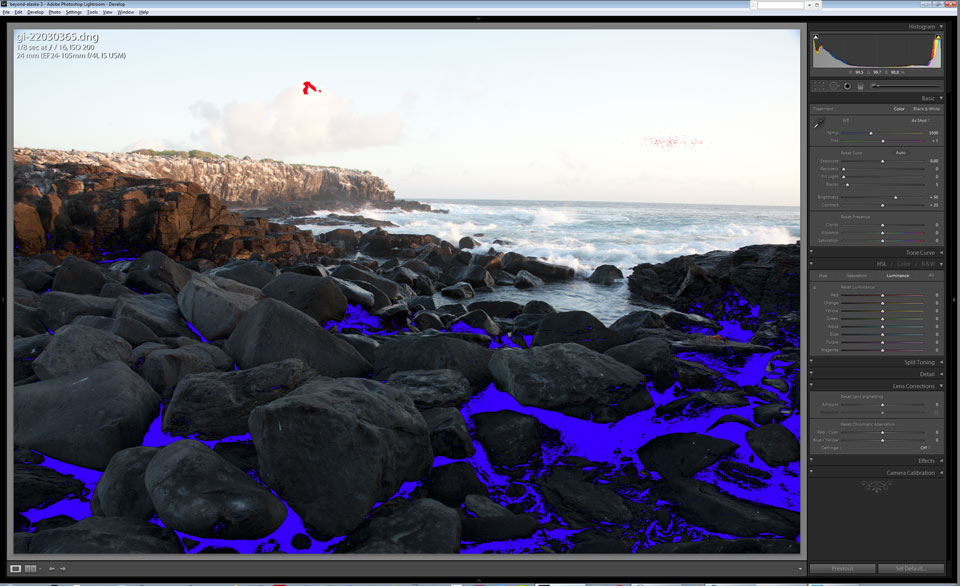
Espanola Island, Galapagos Islands just before sunset. Canon 5D Mark II, 24-105mm f/4L, (24mm), 1/8 sec @ f/16, ISO 200. Maybe some day I'll get my horizons straight! Our group was moving on and I had to grab this shot pretty quickly.
Because the sky is slightly overexposed in this image it looks washed out and featureless. Again, you have to ignore your camera LCD monitor and trust that you can recover the detail in post production. Reducing the brightness in the sky will bring back the color and clouds.
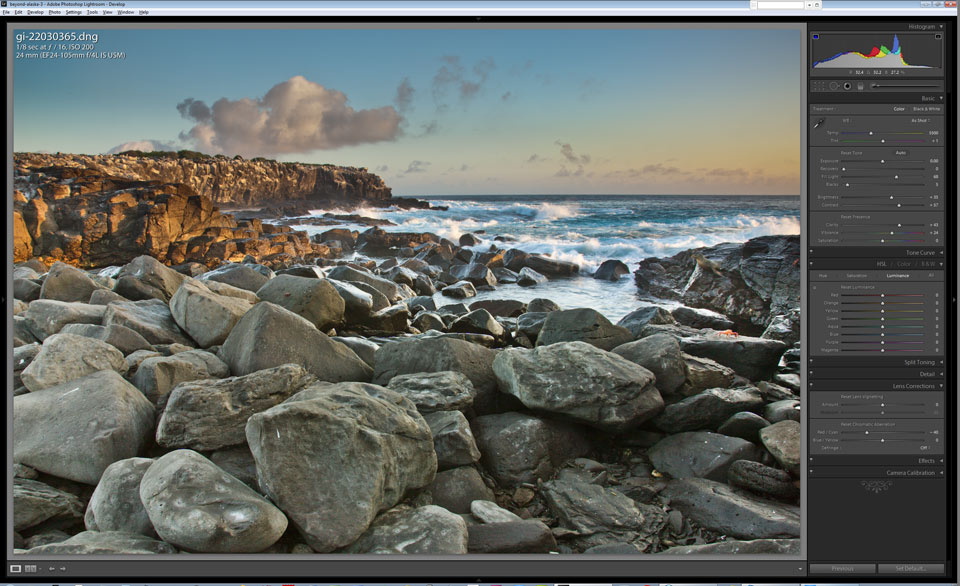
Split graduated ND filter applied to both the sky and the foreground.
This screen captures represents all the adjustments made to balance the image. I used a split grad in the sky to reduce brightness, and a reversed split grad on the foreground to increase brightness.
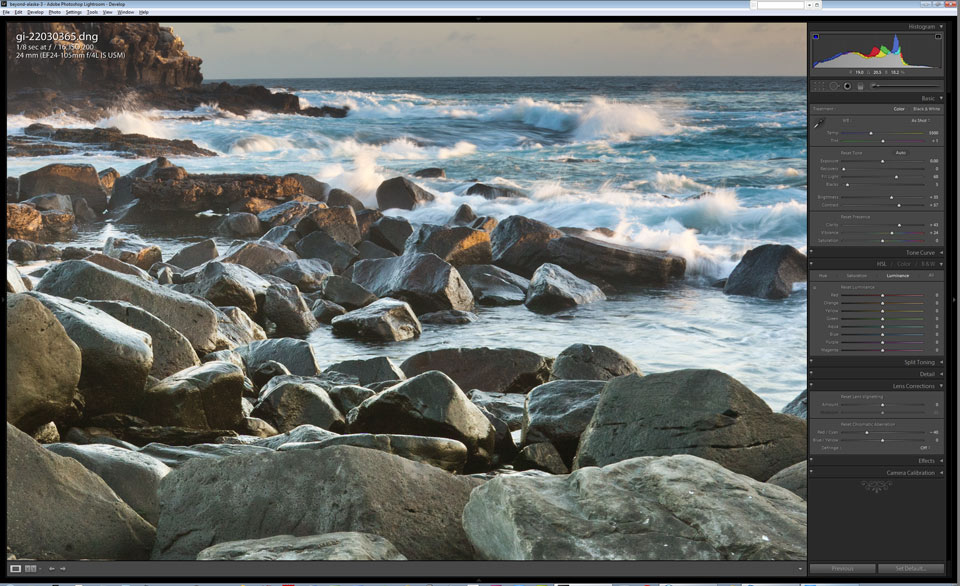
100% crop of the image to show the shadow and highlight integrity even after significant adjustment.
At the time of the image capture, I prefer to push the exposure as far to the “bright” side as possible, as this gives the greatest ability to recover the shadow areas without introducing noise or posterization. It’s a style of shooting called “expose right”, which proves useful in situations like this. To show how well both the shadows and highlights held up with the adjustments applied to this image, I’ve included this 100% crop of the center of the frame which shows smoothness in the shadows, even after significant fill light adjustment.
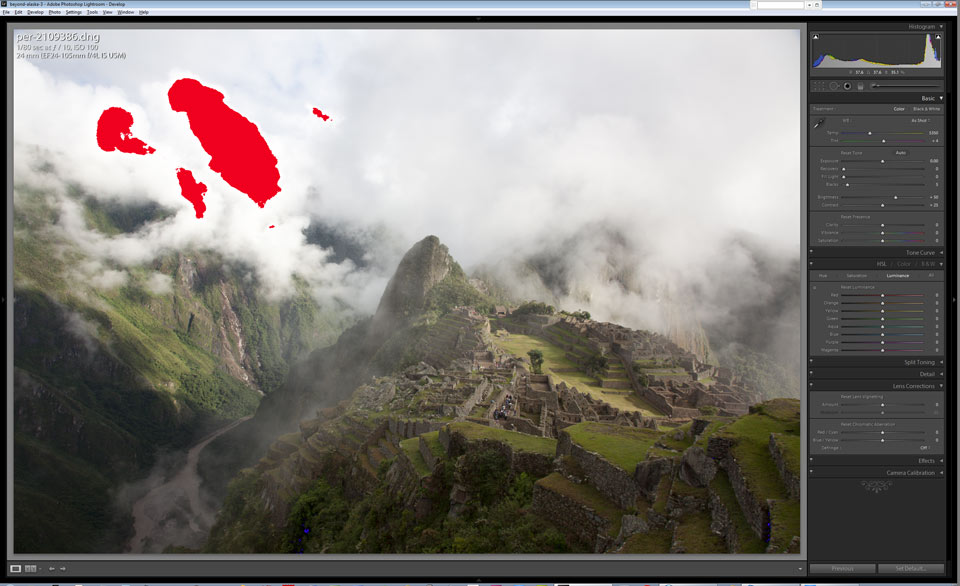
Machu Picchu, Peru, Canon 5D Mark II, 24-105mm (24mm), 1/80 sec @ f/10, ISO 100. I took care in this scene to not overexpose the sky since I wanted all the detail in the clouds, which were rapidly moving and dissipating.
In this scene of Machu Picchu, the center mountain precludes the easy use of a split grad filter, even in Lightroom, so I used the brush tool which enabled me to create the filter in the shape that corresponds with the landscape.
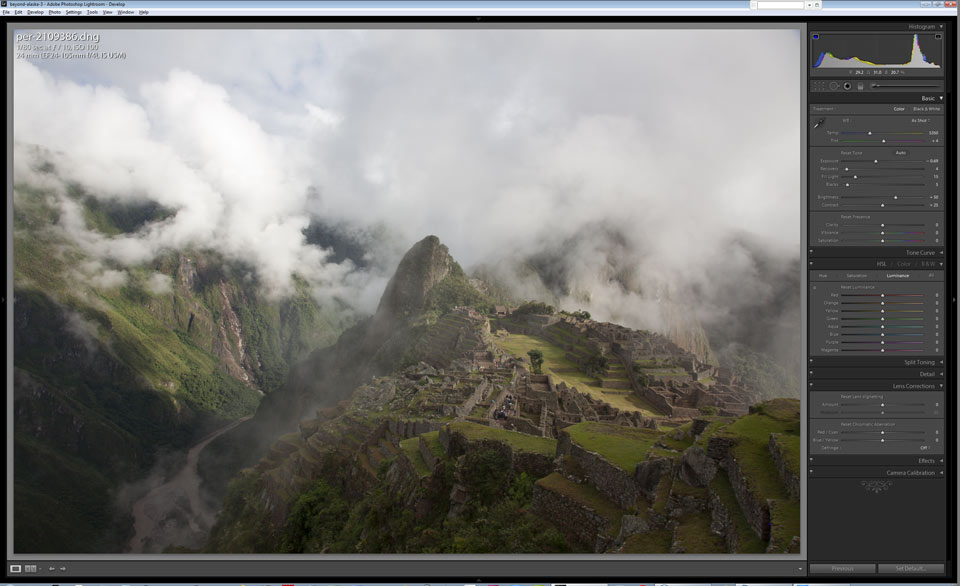
Highlights and shadows have been adjusted.
A few basic adjustments correct the exposure and balance the brights and darks of the histogram. In images which require a fair amount of post production exposure adjustment, it is all the more important to begin with sharp lenses, and have your depth of field appropriately set. Blurry edges, either due to poor lens quality, slightly out of focus, or chromatic aberration, will enhance any edge oddities when stepping hard on the Fill light, or other adjustments in Lightroom.
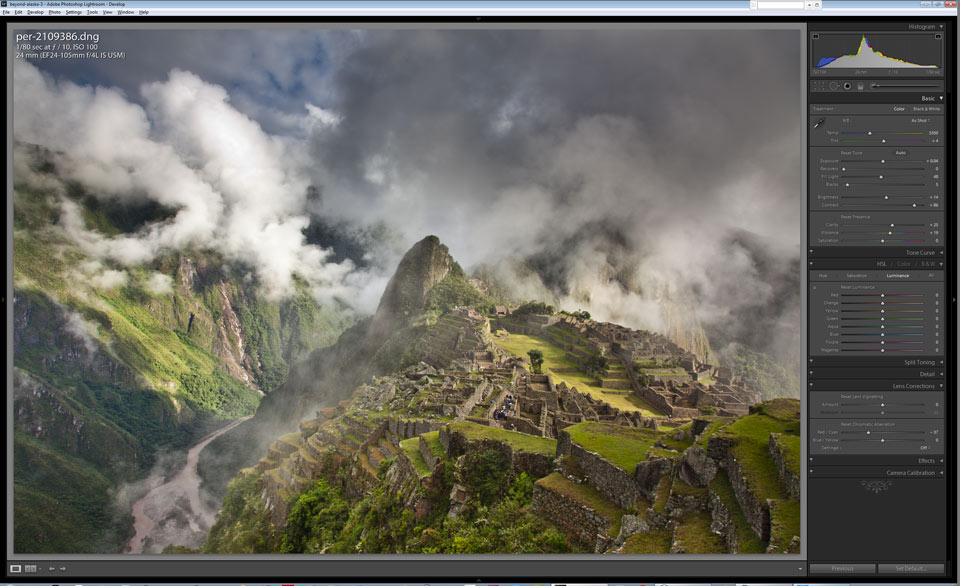
The final image reflects both Split grad ND and localized brush filters, in conjunction with the other develop attributes in Lightroom. I preferred a little vibrance over saturation in this scene.
Once the overall exposure is balanced, then its time for tweaking contrast, clarity, and vibrance, etc., to meet your desired result. There is usually some back and forth tweaking with overall exposure and brightness, once localized brushes or split grad filters are applied.
The degree of exposure balance achieved within just one photo is amazing. Of course, you can always blend two or more different images, but that gets more complicated when there are moving objects in your frame, and the workflow is a bit different, since a .psd or .tif file will need to be generated and worked on in Photoshop. I like the clean and simple method of one file, whenever possible. When absolutely necessary there is the option to blend images or enter the world of HDR.


