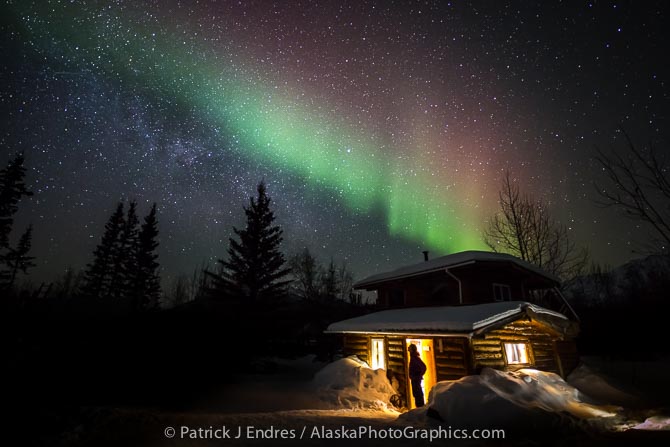
20 seconds @ f/2.8, ISO 2000
I’m often asked what the correct camera exposure is for the northern lights. And, like many answers to broad questions, the answer could be equally broad due to the many variables involved. However, there are some basic starting points, and I’m including an excerpt here from my eBook on How to Photograph the Northern Lights, which will be updated to the 3rd edition soon.
Aurora Exposure
Because aurora photography occurs in the dark, the exposures require long shutter speeds in conjunction with a wide aperture and a high or “sensitive” ISO. That is why people often say that aurora photography pushes the limits of the exposure variables. This is certainly true for ISO and aperture. Long-duration shutter speeds can be easily set, but because the aurora is often moving, and sometimes moving quickly, a shorter shutter speed is preferred because it captures the shape better. A long exposure blurs the shape of the aurora, making it less defined.

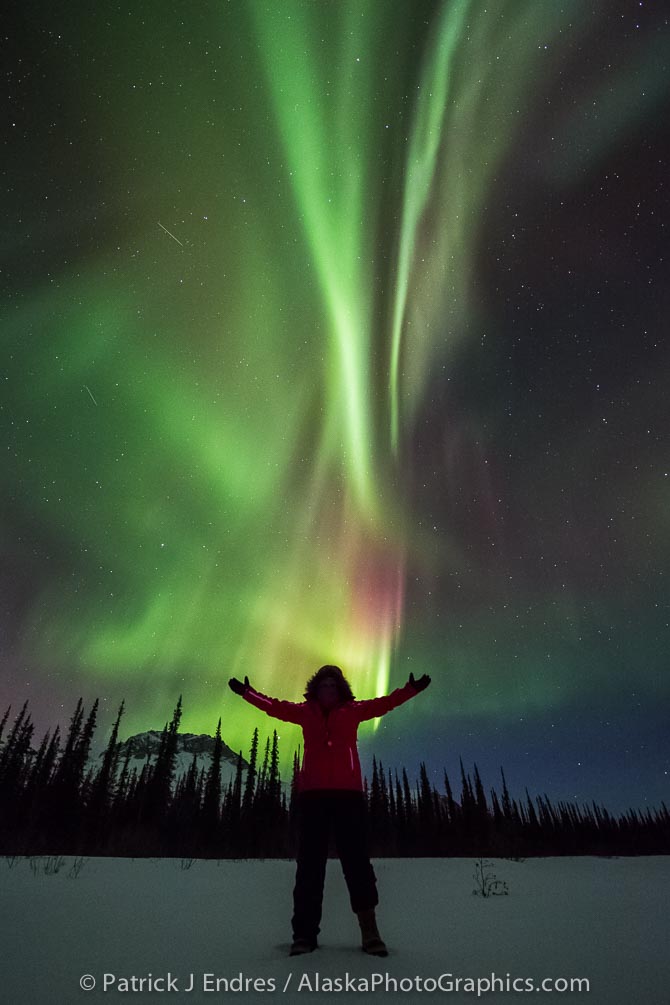
4 seconds @ f/2.8, ISO 6400
When creating an exposure for the aurora, setting your camera to an acceptable high ISO and opening your lens aperture to its widest opening is a good starting point. With those variables set, the shutter speed is most often the changing variable, and the shutter needs to stay open long enough to let in enough light. How long is long enough? Try a test shot. If your picture is too dark, increase the shutter speed, or increase the ISO if your camera can handle it. If the picture is too bright, reduce the shutter speed, or reduce the ISO. Eventually, you will find the appropriate settings for the brightness of the aurora display. This varies from night to night, based on the intensity of the aurora and other factors of ambient light, such as the moon. How to evaluate your exposure using the camera’s LCD display is a topic I discuss in a later chapter in the Book.
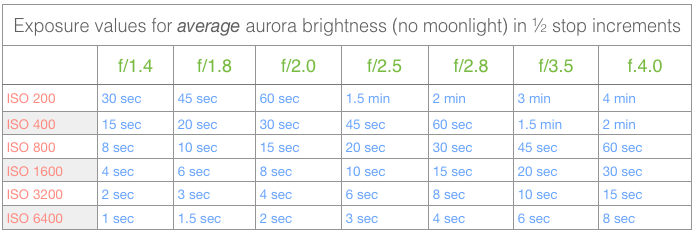
For a starting point, you can use this chart to calculate an initial exposure. Then, after taking a shot, make some evaluations and adjustments based on the conditions of that specific moment.

This chart can be used as a starting point when photographing the aurora. Take a test shot and make adjustments as necessary due to variable degrees of ambient light and aurora brightness.


