How to get rid of headlamp light pollution in your aurora photos.
If you have been on a venture to photograph the northern lights, then you have encountered the challenge of photographing in the dark while still being able to control your camera settings. A headlamp with a red filter can help provide the necessary light to assist with camera adjustments. However, that light can easily find its way into the picture if you are not careful. In order to avoid headlamp light pollution in your aurora photos, see headlamp etiquette practices on my blog article here.
If you end up with a photo that includes some unwanted headlamp light, don’t throw it away just yet. You may be able to remove that headlamp light pollution without too much trouble in Lightroom. I prefer Lightroom because it offers an environment where all alterations to an image are made on the RAW file itself.
Here is an example of one such image. Someone (not to be named) on recent photo tour did not have their headlamp pointed in the down position, which resulted in red light being broadcast upon the snowy foreground. Here are some screenshots for a quick fix of this.
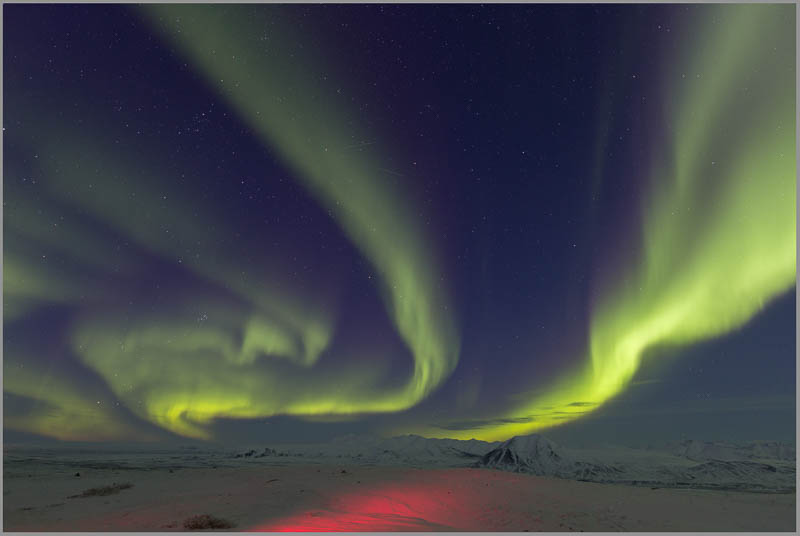
This is the original photo, which shows the foreground lit by a red headlamp. The exposure was 10 sec. @ f/2.8, ISO 1600, with a Tamron 15-30mm lens on a 5D Mark III.
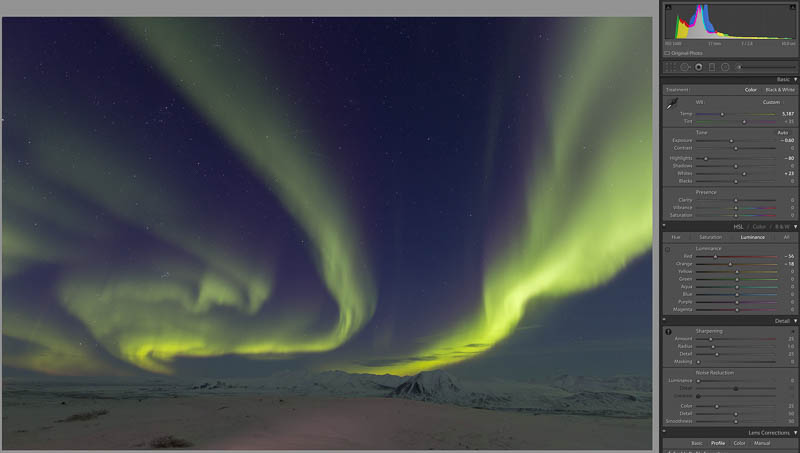
First, reduce the saturation and luminance of the portion of the image which contains the unwanted red color. Select “Saturation” and click the little radio button icon on the left, then hover over the red portion of the photo and click and drag downward with your mouse and watch the desaturation process until you are satisfied. Then select “Luminance” and repeat this process.
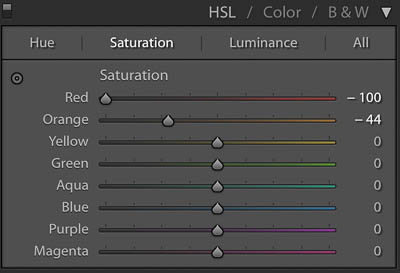
Desaturation of the colors using the color specific desaturation tool.
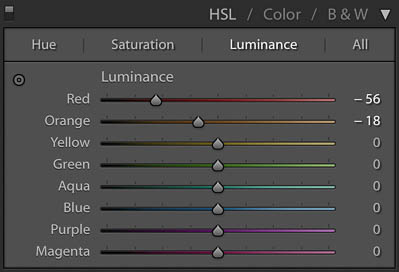
Luminance reduction using the color specific tool in Luminance mode.
This is the result after applying both localized desaturation and luminance. You can see that although it is much better, it still needs a few more adjustments.
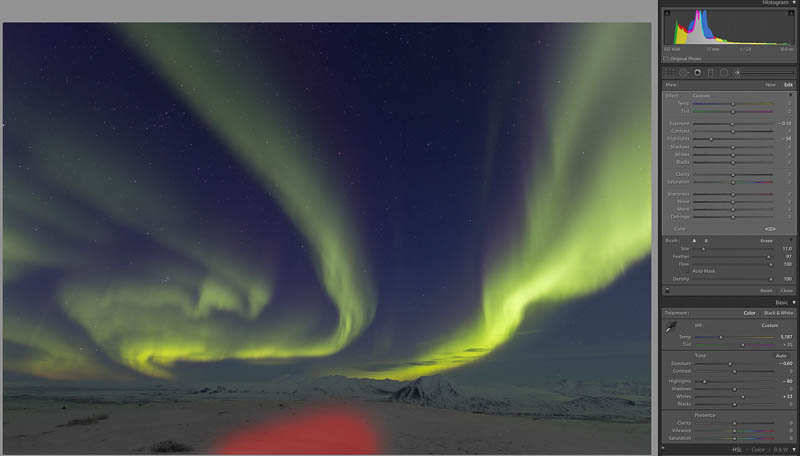
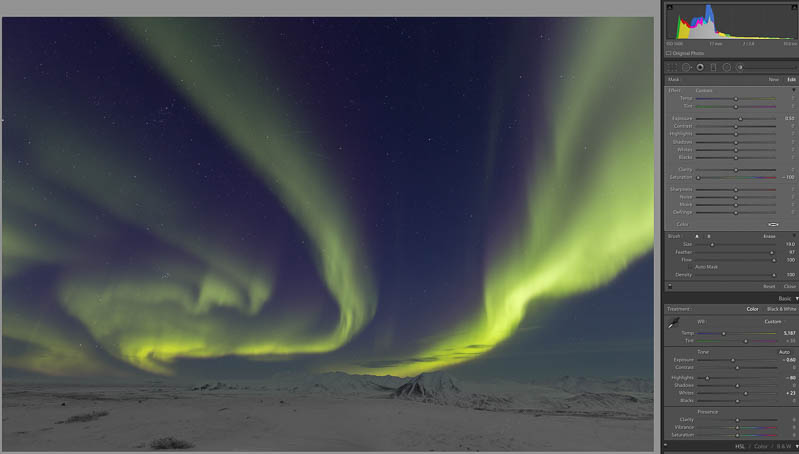
Depending on how bright the light is, you may need to add an additional local brush adjustment with some highlight or exposure adjustment to darken the foreground to match the rest of the area. In this case, I reduced the highlights. (yes, I know, the red color is the default brush reveal color in Lightroom so it is a little confusing, but this red overlay denotes the applied brush area, not the red headlamp light)
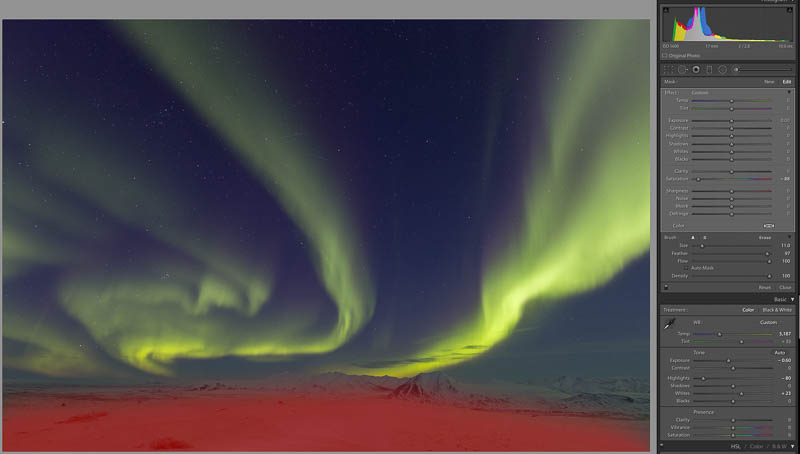
I made one final adjustment with a brush, applying some overall desaturation to the foreground to make it uniform. Once again, the red color denotes the area where the desaturation is applied.
This is the result after addressing the red color. Upon review, I thought the foreground could be brightened a little.
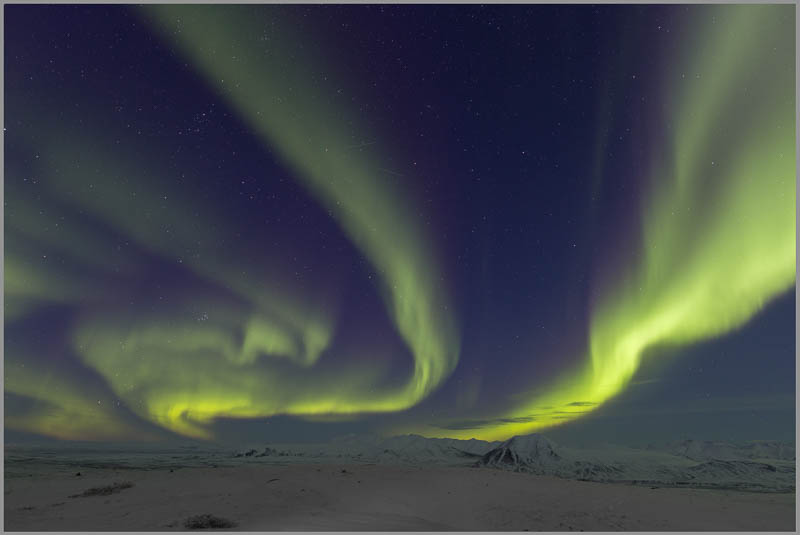
I selected the previous brush for overall desaturation and added +.50 exposure to brighten the foreground. This is the final image with just a few minutes of work in Lightroom. It could be perfected further with a little more time. Some images will be easier to correct than others, but it is good to know that a fix is not difficult in many cases.